
Getting started
Before anyone in the shop adds their first part, KRON needs configuring to the way your company works. This chapter is the short version of that setup, in the order the steps depend on each other. Each one links to the full explanation.
None of this has to be repeated per project. Standards and material templates in particular are set once and then applied automatically to every new drawing set and every new warehouse.
1. Select your standards
Where: Production or Warehouse module → Standards Manager, the book icon at the bottom of the left-hand rail.
Tick the standards catalogues you work with and save. There is a button at the top that selects every standard of a country in one click. KRON currently ships EN, Indian and South African standards.
Once saved, the selection is applied automatically to all new projects, and you can change it at any time.
This step comes first because it changes how imported files are interpreted. When a DSTV file arrives from a standard Tekla export it contains geometry but no standard, so KRON picks a standard by matching the geometry against the catalogues you have selected. Get this wrong and parts import as non-standard.
If you import parts before selecting your standards, you will have to delete those parts and load them again — changing the catalogue afterwards does not retroactively re-match parts that are already in the project.
See Standards for the detail, including what to do when a standard you need is missing.
2. Build your material templates
Where: Production → Adding Parts → the Profiles panel → the stacked-sheets icon. The same button exists in the Warehouse module's Profiles panel.
The same profile arrives under different material names depending on the supplier and the standard it was made to. KRON handles this with a name and an optional alias: the name is what your project calls the material, the alias is what your supplier calls it.
Enter the materials you actually buy, then save the set as a template and mark one as the default — a star appears next to it. The default template is applied automatically whenever a new warehouse or a new drawing set is created, so nobody has to retype the list.
See Materials and aliases and Material templates — both are illustrated there.
3. Enter your company details
Where: Personal Account → Organization.
Set the country — the documents KRON generates depend on it — and the company details. This information is used to produce invoices for plan payments, so it is worth getting right before the first invoice rather than after.
See the Administrator guide.
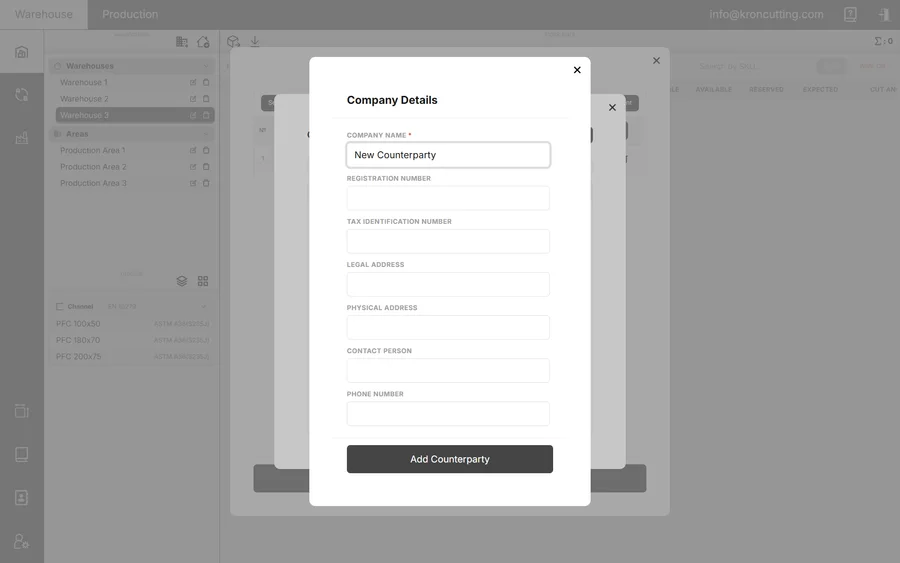
4. Enter your counterparties
Where: Warehouse module → Counterparties Directory.
Counterparties are how inventory stays traceable: a receipt document always records who the stock bars came from. Click Create in the top-right corner. Name and tax identification number are required; registration number, addresses, contact person and phone are optional.
Do this before your first receipt document — a receipt without a counterparty is a bar you cannot trace back to a supplier.
5. Create employee accounts
Where: Personal Account → Employees.
Create an account per person — full name, email, job title and a password you set — then choose which features they can reach with the checkboxes. Access can be changed at any time.
If the number of employees exceeds what your plan allows, access is restricted for all employees until the count is back within the limit. Reduce seats before moving down a tier.
See User management.
Then: run something small
With the above in place, the shortest path to a real result is:
- Open the Production module and create a project.
- Add a drawing set — name it after your project code.
- Add a handful of parts, either by hand or by importing a few NC files.
- Create a stage on the Adding to Cutting tab and move the parts into it.
- On the Cutting tab, set the stock length and kerf, and run the optimiser.
- Download the drawing and check it reads the way your operator needs it to.
That loop — adjust a setting, re-run, compare the numbers — is the core of using KRON well. The cutting parameters reference explains what each setting changes and which ones are worth touching first.